
Home Improvement
How to Remove Remax Trimmer Head BC200DL Easily

Maintaining your gardening tools, such as the Remax Trimmer Head BC200DL, is key to ensuring they last longer and perform better. For DIY gardeners, landscaping professionals, and home improvement enthusiasts, learning how to remove the Remax Trimmer Head BC200DL is essential. This trimmer head is a go-to tool for trimming grass and weeds, but over time, proper maintenance – including removing and cleaning the head – ensures it continues to operate smoothly.
This guide provides a comprehensive step-by-step process for removing the Remax Trimmer Head BC200DL, offers practical tips, and addresses common pitfalls to help you complete the task with confidence.
Understanding the Remax Trimmer Head BC200DL
Features and Components of the Remax Trimmer Head BC200DL
The BC200DL trimmer head is designed for efficient cutting and durability. It’s compatible with many string trimmers, making it a preferred choice for gardeners and landscapers. Key features include:
- Sturdy build for both professional and home use.
- Universal compatibility with a variety of trimmer brands.
- Easy restringing system for quick tool maintenance.
Importance of Maintenance and Removal
Routine maintenance of the trimmer head is crucial for optimal performance. Dirt, grass, and debris build up over time and can obstruct the functionality of the head. Removing the Remax Trimmer Head BC200DL allows you to clean it properly, replace worn parts, or restring it as needed. Neglecting regular removal and maintenance could lead to reduced cutting performance or damage to the trimmer.
Preparing for Removal
Safety First
Before beginning the removal process, follow these safety precautions to prevent accidents:
- Turn off the trimmer and disconnect it from any power source to avoid accidental activation.
- Wear protective gloves to shield your hands while working.
- Keep the area organized to ensure tools are within reach and obstacles are out of your workspace.
Tools You’ll Need
To effectively remove the Remax Trimmer Head BC200DL, gather the following tools and equipment in advance:
- A wrench or pliers.
- A flathead screwdriver.
- A soft cloth for cleaning.
- Replacement parts (if needed).
Step-by-Step Guide to Remove Remax Trimmer Head BC200DL
Follow these detailed steps to safely and easily remove the trimmer head.
Locate the Trimmer Head
Identify the location of the trimmer head on your device. The Remax BC200DL head is usually at the base of the shaft, connected to the spindle.
Secure the Trimmer
Place the trimmer on an elevated, stable surface to prevent it from rolling or tipping over. Use clamps if necessary to secure it during the process.
Unscrew the Retaining Nut
Using a wrench or pliers, loosen and unscrew the retaining nut placed on top of the trimmer head. Remember, some models require turning clockwise to loosen, so check the manual for specifics.
Remove the Trimmer Head Assembly
Slide the trimmer head off the spindle carefully. If it feels stuck, gently tap the sides with the flathead screwdriver to free it. Avoid using excessive force, as this could damage the components.
Inspect and Clean the Components
Once the head is removed, inspect it for wear and tear. Clean all parts thoroughly with a soft cloth to remove dirt and debris. Replace any damaged components as necessary.
Common Mistakes to Avoid
- Forgetting to disconnect the power source could lead to accidents.
- Using excessive force increases the risk of damaging the trimmer head.
- Misplacing small components like the retaining nut. Keep them secure while disassembling.
Tips for a Smooth Removal Process
Handling Stuck or Stubborn Trimmer Heads
If the trimmer head is stubborn and won’t come off easily, try the following tips:
- Use penetrating oil to loosen rusted or tight components.
- Gently tap around the base while turning the nut for added leverage.
Post-Removal Maintenance
To keep your trimmer head in great shape after removal, follow these best practices:
- Clean and dry the components thoroughly before reassembly.
- Regularly lubricate the spindle to prevent rust and ensure smoother rotation.
- Store the trimmer head in a dry place when not in use.
You May Also Like: Benefits of Using XCV Panels for Energy Efficiency
Conclusion
Routine maintenance and careful handling while removing the Remax Trimmer Head BC200DL will ensure continued reliability and peak performance from your gardening tool. Taking a proactive approach to care saves you time and money in the long run.
By following our comprehensive guide, you’ll be well-equipped to maintain your trimmer and tackle all your gardening tasks with confidence. For any replacement parts or further assistance, consult the device manual or reach out to experienced professionals.
FAQs
How do I remove the Remax Trimmer Head BC200DL if it’s stuck?
If the trimmer head is stuck, apply penetrating oil to reduce friction or use light taps with a screwdriver. Ensure not to damage the spindle.
Do I need special tools to remove the Remax Trimmer Head BC200DL?
Basic tools like a wrench or pliers and a flathead screwdriver are usually sufficient. Check your trimmer manual for specific requirements.
How often should I remove the Remax Trimmer Head BC200DL for maintenance?
It’s recommended to remove and clean the trimmer head every 2–3 months, depending on usage frequency and exposure to debris.
Can I reuse the trimmer head assembly after removal?
Yes, as long as the components are in good condition. Inspect the parts for damage and clean them before reassembling.
How can I replace the string on the Remax Trimmer Head BC200DL?
After removing the head, pull out the worn string and insert a new one according to the trimmer’s instructions. Ensure the string is wound tightly.

As more people become aware of the environmental impact of standard pest management techniques, demand for eco-friendly methods has surged. Homeowners concerned about their well-being and the planet’s health are now choosing solutions that cause less harm while effectively managing pests. Partnering with a reputable pest control company that offers green alternatives can be instrumental in maintaining a safe and healthy home.
Unlike traditional chemical-based approaches, eco-friendly pest control focuses on minimizing toxic exposure to humans, pets, and beneficial creatures. These strategies not only keep your family safe but also preserve the integrity of the surrounding ecosystem. Sustainable pest management means addressing issues at their source instead of just treating symptoms, providing long-lasting results and peace of mind.
Understanding Eco-Friendly Pest Control
Eco-friendly pest control, also called green pest management, is grounded in the principle of using natural, biological, and mechanical interventions to manage pests while minimizing environmental impact. Rather than relying solely on synthetic chemicals, green pest control emphasizes prevention, the use of targeted organic products, and fostering ecological balance. The goal is to maintain control over household pests without introducing toxins that can linger in your home or leach into soil and water systems.
This approach often incorporates practices such as encouraging natural predators, enhancing sanitation, and deploying physical barriers. It may also involve habitat modification and the application of plant-based or mineral-derived substances, as needed. These techniques, when used collectively, provide a holistic and proactive response to pest problems.
Benefits of Eco-Friendly Pest Control
The move toward sustainable pest solutions offers numerous benefits for both people and the planet:
- Reduced Chemical Exposure. Eco-friendly pest management drastically reduces the use of hazardous pesticides, lowering risks to household members and pets.
- Preservation of Beneficial Species. Conventional pesticides often harm non-targeted insects, such as pollinators and natural predators. Green control methods are selective, helping important species remain part of the ecosystem.
- Decreased Risk of Resistance. Pests can develop resistance to chemical treatments over time. By incorporating multiple tactics such as Integrated Pest Management (IPM), green methods ensure more effective, lasting results.
- Environmental Conservation. Sustainable practices help preserve clean water and healthy soil, benefiting both local habitats and wider environmental systems. Studies by organizations such as the U.S. Environmental Protection Agency emphasize the broader benefits of reducing reliance on pesticides.
Common Eco-Friendly Pest Control Methods
A variety of effective and accessible techniques fall under the umbrella of eco-friendly pest management:
- Biological Controls. These involve introducing natural enemies, such as ladybugs or nematodes, to control pest populations by predation or parasitism. For example, ladybugs help manage aphids in gardens and landscapes.
- Botanical Insecticides. Derived from plants, options such as neem oil, pyrethrum, and diatomaceous earth are used to target pests. Such substances typically break down quickly and are less disruptive to beneficial insects.
- Mechanical Controls. Traps, screens, and manual removal can be highly effective for pest management, especially in indoor settings. Sealing entry points and placing physical barriers are cornerstone approaches.
- Cultural Practices. Strategic cleaning, crop rotation, and habitat manipulation deter pests by removing attractants and making environments less hospitable.
Details on these methods and additional guidance can be found at trusted sources such as Better Homes & Gardens.
Implementing Eco-Friendly Pest Control at Home
Adopting sustainable pest control is often straightforward for homeowners able to implement simple changes. Consider the following steps:
- Seal Entrances. Conduct regular inspections for cracks, gaps, or holes around windows, doors, and the foundation. Use weatherstripping, caulk, or mesh to block entry points.
- Maintain Cleanliness. Routine cleaning in kitchens, pantries, and food storage areas eliminates crumbs and spills that invite pests. Properly dispose of garbage and store food in sealed containers.
- Utilize Natural Repellents. Essential oils such as peppermint, citronella, and eucalyptus can deter insects when used properly. Small sachets or sprays in target areas enhance their effectiveness.
- Encourage Wildlife Allies. Install birdhouses, bat boxes, or insect hotels to attract beneficial predators, naturally reducing pest populations.
Choosing the Right Eco-Friendly Pest Control Service
When professional help is needed, it is important to select a service committed to sustainability and safety. Look for companies certified in green practices by programs such as GreenPro or EcoWise. Ask about the methods and products they use, as well as their success with eco-friendly approaches in residential settings. Experience and a proven reputation are key indicators of quality service in this evolving field.
Many pest control services offer consultations to assess problem areas and recommend integrated solutions tailored to your household’s specific needs.
Conclusion
Eco-friendly pest control solutions offer an effective and responsible way to safeguard your home, your health, and the local environment. By understanding the benefits and practical methods of green pest management, homeowners can choose solutions that lead to long-term, sustainable pest prevention. A proactive, informed approach is essential to a healthier future for households and communities.
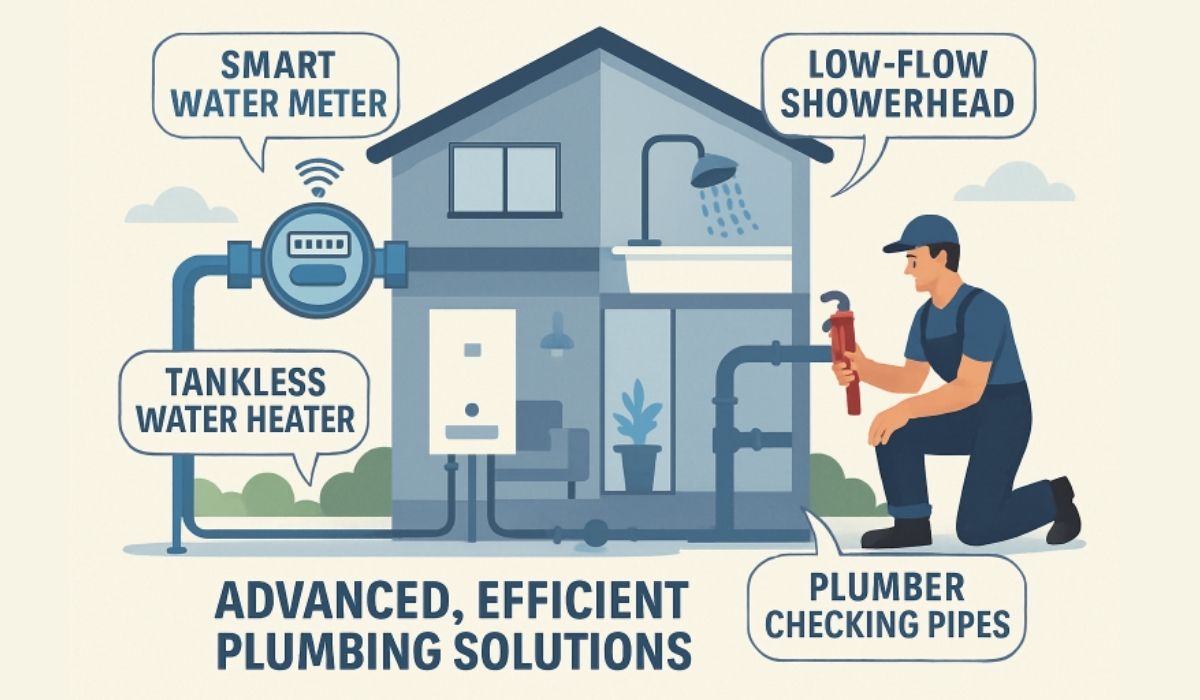
In today’s fast-paced world, modern plumbing solutions are transforming how homes function, blending technology and sustainability for optimal performance. These innovations not only help conserve water and energy resources but also reduce operating costs and extend the lifespan of household systems. Homeowners are increasingly turning to advanced plumbing features to create comfortable and environmentally conscious living spaces. If you’re looking to enhance your home’s efficiency or address plumbing concerns, connecting with a reliable plumber in your region is the best way to start.
From innovative plumbing technology to water-efficient fixtures, modern options are making it easier to monitor, control, and conserve vital resources at home. With so many innovative products on the market, it’s easier than ever to upgrade legacy systems for greater performance and peace of mind. As eco-friendly materials gain popularity, homeowners can adopt solutions that are both effective and sustainable.
Beyond personal savings, embracing advanced plumbing methods also supports broader environmental objectives, such as reducing urban water demand and lowering carbon emissions. Upgrading to intelligent, resource-conscious systems is a proactive step towards future-proofing properties. Whether you’re renovating or building new, working alongside skilled professionals in the industry ensures proper installation and maximum benefit from these upgrades.
For tailored expertise and prompt service, consider reaching out to local plumbers who are well-versed in regional building codes and the latest advancements in plumbing technology. Their experience enables them to recommend and install optimal solutions that match your home’s unique layout and needs.
Smart Plumbing Systems
Integrating innovative technology into home plumbing systems represents a significant leap forward in proactive water management. These innovative systems utilize Internet of Things (IoT) sensors to monitor water flow, detect anomalies, and alert homeowners to potential leaks in real-time. Remote access from mobile apps allows users to shut off the water supply instantly if an issue is detected, minimizing potential water damage. According to a recent review by The New York Times Wirecutter, smart leak detectors are among the most effective tools for preventing major disasters and keeping utility bills under control.
Eco-Friendly Fixtures and Materials
Sustainability is a prevailing theme in modern plumbing, with eco-friendly fixtures such as low-flow toilets and water-saving showerheads helping homes reduce unnecessary water usage. Contemporary faucets now feature aerators that maintain high water pressure while reducing the flow volume. Additionally, long-lasting materials such as PEX tubing are gaining popularity for their resistance to scale build-up and flexibility during installation—features that surpass those of legacy copper or PVC piping. These improvements not only reduce environmental impact but also drive cost efficiency for homeowners.
READ ALSO: PLG Supplies: The Secret Toolbox for Products That Sell Themselves
Tankless Water Heaters
Energy conservation takes center stage with tankless water heaters, which warm water only when it’s needed rather than maintaining a large hot water reservoir. This on-demand approach significantly minimizes standby energy loss. As highlighted by the U.S. Department of Energy, homes equipped with tankless models can achieve energy savings of up to 34% compared to conventional storage heaters. Their compact form factor also frees up valuable space in utility closets or basements, making them a perfect choice for modern, energy-conscious families.
Advanced Leak Detection Technologies
The cost and inconvenience of water damage can be substantial, with even small leaks causing long-term structural issues if unaddressed. New-age leak detection options now include ultrasonic sensors, advanced moisture detectors, and automated shut-off valves, all designed to react quickly to emerging problems. These systems can detect moisture behind walls or beneath floors—areas previously impossible to monitor effectively. Early intervention prevents more extensive repairs, helps conserve water, and maintains overall system health.
Regular Maintenance and Professional Services
Professional maintenance remains essential for maximizing the longevity and efficiency of modern plumbing technologies. Skilled plumbers offer comprehensive inspections, routine cleaning, pipe re-sealing, and fixture upgrades. Not only do these services catch potential problems early, but they also optimize water flow and pressure throughout the home. Homeowners are encouraged to partner with trusted service providers for regular checkups and advice on upgrading aging infrastructure. By doing so, you’ll ensure your system continues to meet today’s efficiency standards and delivers uninterrupted performance.
Embracing modern plumbing innovations allows homeowners to significantly improve comfort, efficiency, and long-term reliability within their homes. Advanced technologies, water-saving fixtures, durable materials, and innovative maintenance solutions work together to reduce waste, lower utility costs, and prevent unexpected repairs. These innovations also support environmental sustainability by conserving water and energy without sacrificing performance. By staying informed about the latest developments and partnering with skilled, experienced professionals, homeowners can make confident upgrades that enhance daily living. The result is an eco-friendly, cost-effective plumbing system designed to remain resilient and dependable for years to come.
YOU MAY ALSO LIKE: Simple Changes to Upgrade Your Home’s Plumbing System
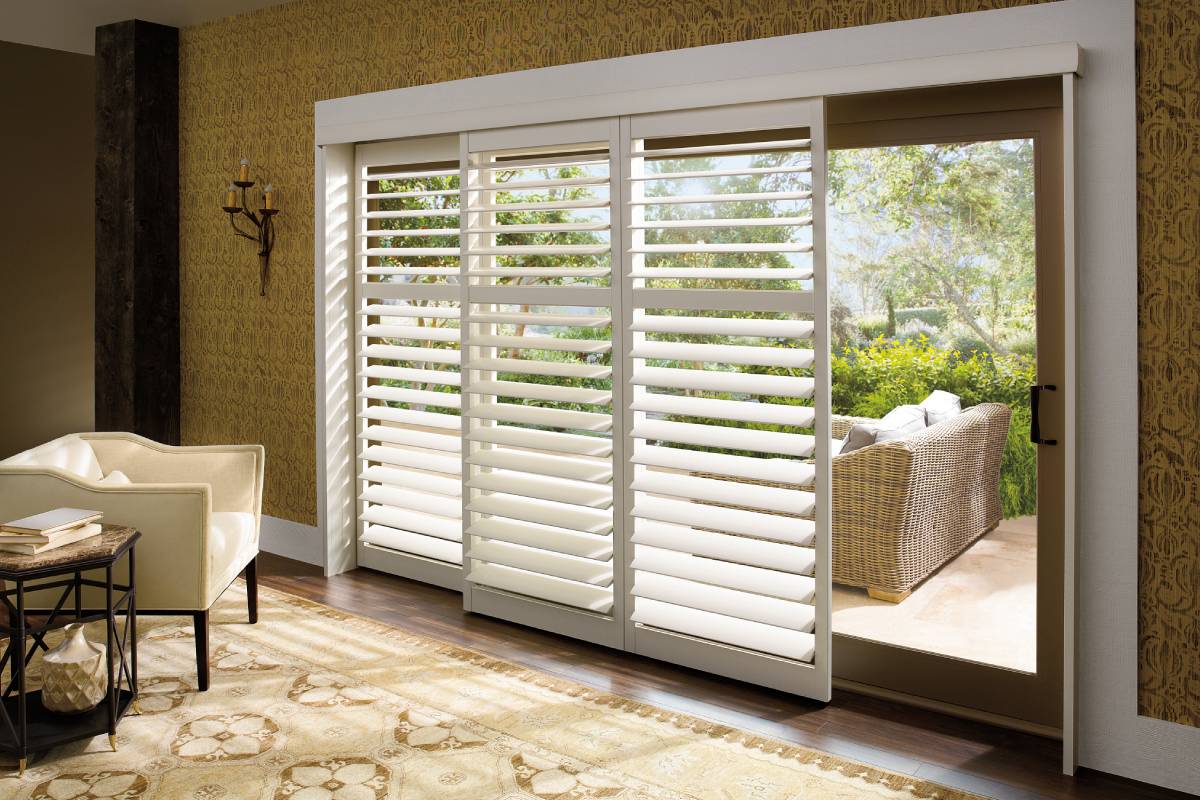
Designing a sustainable living space requires thoughtful decisions that minimize energy use and environmental impact, while still prioritizing comfort and style. One of the most influential upgrades you can make is enhancing your window systems. By transitioning to eco-friendly window solutions, homeowners can increase energy efficiency, comfort, and even property value. For example, installing new Cape Cod windows can help dramatically reduce heating and cooling costs while also contributing to a healthier ecosystem.
Modern window technology promotes not only cost efficiency but also temperature control, reduced carbon footprint, and better indoor air quality. Properly chosen windows can minimize drafts and condensation, enhancing year-round comfort. Eco-friendly windows provide lasting benefits for homeowners and the environment, particularly in regions like Cape Cod where sustainable upgrades are on the rise due to stricter energy regulations. Innovations in window design, including natural light optimization and smart technology integration, present opportunities for sustainable living with well-insulated, responsibly sourced materials.
Energy-Efficient Glazing Options
Upgrading to high-performance glazing is a fundamental step toward sustainability for any home. Technologies such as double- and triple-glazing use two or three panes of glass separated by an inert gas, most often argon, to drastically reduce heat transfer. This means your home stays warmer in winter and cooler in summer, significantly reducing the load on your heating and cooling systems. Low-emissivity (Low-E) coatings are another key feature to look for. These microscopic metal layers reflect infrared energy (heat) back into the home during cold weather and out during warm spells. The result: better temperature regulation and significant savings on energy bills.
Sustainable Frame Materials
Eco-friendly window frames are crucial for both durability and sustainability, with several options available. FSC-Certified Wood offers natural insulation and classic aesthetics when sourced responsibly. Recycled Aluminum is lightweight, highly durable, and conserves resources because it is infinitely recyclable. Fiberglass, made from sand and recycled glass, offers resistance to warping and weather impacts. uPVC (Unplasticized Polyvinyl Chloride) is a rigid, energy-efficient plastic that is recyclable. Lastly, Composite Materials combine recycled wood and polymer to mimic wood’s look while requiring less maintenance and showcasing age-resistant qualities. All these materials enhance window longevity and promote environmentally responsible construction practices.
Smart Window Technologies
Intelligent window systems adapt in real time to environmental changes. Thermochromic glass, for example, automatically darkens as temperatures rise, reducing heat gain and lowering cooling needs. Electrochromic glass enables homeowners to alter window tint with the touch of a button, optimizing daylight and privacy at will. Not only do these innovations enhance daily comfort, but they also deliver tangible energy savings, reducing strain on your HVAC system and adding a modern touch to any home. Smart glass options are increasingly utilized in new construction and renovations for forward-thinking, sustainable design.
Maximizing Natural Light
Harnessing sunlight is one of the simplest, yet most effective ways to bolster energy efficiency. By carefully situating large windows and selecting designs that maximize light penetration, you can decrease reliance on artificial lighting and improve your mood and well-being. Skylights, transom windows, and tubular daylight devices provide additional avenues for channeling sunlight into darker interiors. Consider window orientation and shading options to maximize natural light without excessive heat gain. According to HomeLight, the boost from natural light extends beyond energy savings, with positive impacts on mental health and productivity, making it a priority in modern home design.
Importance of Proper Installation
No matter how advanced the product, a faulty installation can undermine even the best windows. Proper fitting ensures airtight seals, preventing drafts that drive up energy costs and degrade indoor comfort. Using qualified, experienced professionals is always recommended for accurate measurements, careful sealing, and robust weatherproofing. High-quality installation maximizes the return on investment by safeguarding window performance and longevity for years to come.
Maintenance Tips for Longevity
Routine care for windows is essential for maintaining their condition and ensuring optimal performance over the years. Key habits include gently cleaning glass and frames to eliminate dust, pollen, and debris; inspecting and renewing weatherstripping to ensure tight seals; and lubricating hinges, latches, and other hardware for smooth operation. Attending to these maintenance tasks not only enhances the aesthetics of your windows but also extends their energy efficiency and longevity.
Cost Considerations and Incentives
While sustainable windows often cost more initially, this investment pays off in numerous ways. Lower utility bills, increased comfort, and appreciation of property value quickly offset the upfront costs. There are also a number of local and federal incentives, tax credits, and rebate programs available to help cover installation or upgrade expenses. Homeowners can research eligibility for benefits through programs like ENERGY STAR®, which is known for endorsing energy-saving windows and providing up-to-date rebate information. Many state governments offer their own incentives to encourage homeowners to go green.
Conclusion
Embracing eco-friendly window solutions is one of the most effective steps you can take to enhance the sustainability, value, and comfort of your home. From selecting appropriately glazed glass to choosing sustainable frame materials and leveraging smart technologies, each decision adds efficiency and environmental integrity to your living space. Make sure to invest in professional installation and consistent maintenance to safeguard your upgrades. With each change, you contribute to a brighter, greener future for both your household and the wider community.
Relocating to Naples, Florida: A Comprehensive Guide

Lessons in Leadership: Learning from the Automotive Industry’s Visionary Innovators

Top 5 Met Tower Installation Companies in 2026: Ensuring Accurate Wind Resource Assessment

The Ultimate Guide to Group Transportation Solutions

NBA 2K22 Clippers Dorna Enhances Realism
-

 Home Improvement1 year ago
Easy Ways to Clean and Maintain Your Foam Play Mat
-

 Celebrity2 years ago
Who Is Andrew Santino Wife? The Full Story
-

 Tech2 years ago
Explore iZoneMedia360 .Com Features & Benefits
-

 Entertainment2 years ago
Remembering Melanie Olmstead Yellowstone’s Unsung Hero
-

 Uncategorized2 years ago
Prairie Dog Guide: Habitat, Behavior, and Conservation
-

 Celebrity2 years ago
A Deep Dive into Jeremy Allen White Movies and TV Shows
-

 Business2 years ago
How Influencersginewuld Shapes the Future of Branding
-

 Apps & Games2 years ago
The Pizza Edition Games: A Perfect Slice of Fun and Flavor